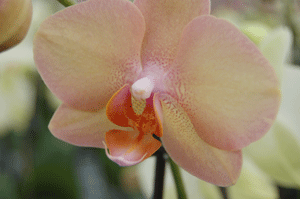
 After you have grown healthy phalaenopsis orchids that bloom year after year, you may want to take your hobby to a new level by pollinating them. Pollination is achieved when the pollen, or pollina, attaches to the stigma and enters the ovule for fertilization. This will result in the formation of a seed pod behind the flower. Germinating orchid seeds is a difficult task, and many growers remove the seed pods just before they are fully ripe and send them to laboratories for flasking.
- The first thing you need to do is choose a blooming phalaenopsis orchid that has been growing healthily for some time. Select one that has been repotted recently, because you cannot repot it after the seed pod starts developing.
- Choose a flower that has fully-formed colors and waxy-looking petals, and has been blooming for a few days.
- Next, you have to locate the orchid’s main reproductive organ, which is the column. This small tubular extension can be found at the center of the flower, between the two largest petals and directly above the lip—the part of the flower that has hook-like tendrils.
- After you have found the column, look for the anther cap. It is located at the end of the column, and it has a slightly pointed piece that points away from the column and towards the lip.
We will continue our discussion on the pollination of phalaenopsis orchids in our next post. If you have any questions about phalaenopsis orchids, you can get advice from our support team in our orchid care forums.

 After you have grown healthy phalaenopsis orchids that bloom year after year, you may want to take your hobby to a new level by pollinating them. Pollination is achieved when the pollen, or pollina, attaches to the stigma and enters the ovule for fertilization. This will result in the formation of a seed pod behind the flower. Germinating orchid seeds is a difficult task, and many growers remove the seed pods just before they are fully ripe and send them to laboratories for flasking.
