
Get notified every time a new article comes out and
keep up with the latest plant care or plant trend.
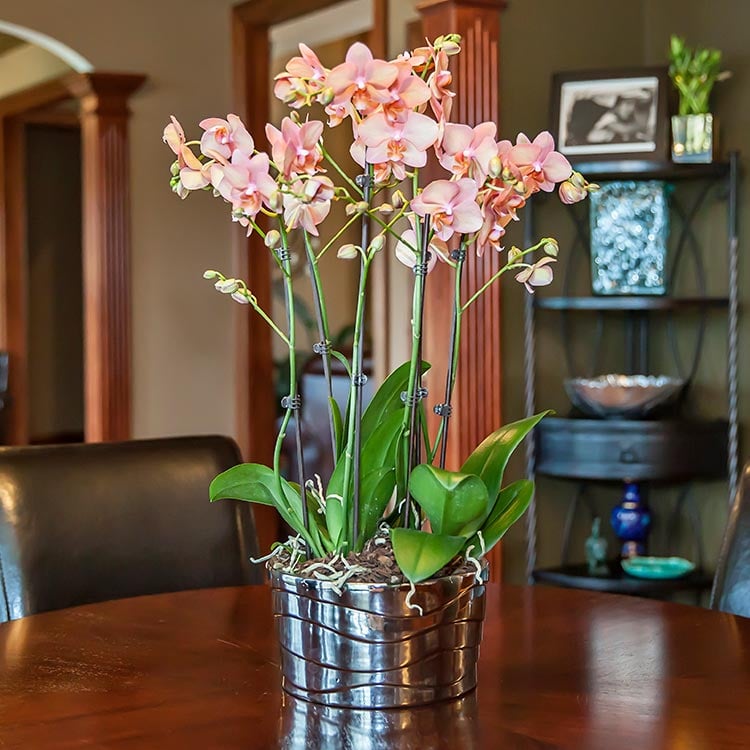
Normally less—not more—is the rule of thumb when it comes to orchid care. Exposing your orchids to too much water, sunlight or moisture, for example, can have serious health repercussions for your plant. But when it comes to the number of orchids in your planter, the more the merrier!
If you’ve seen pictures of multiple orchids in planters like the one here, you may have wondered if the flowers inside were in need of some space. Today’s post will discuss how it’s possible to keep several orchids in one planter without jeopardizing their health.
How can you create a full, pleasing look for your planter? Fill it with multiple Just Add Ice® Orchids! You can achieve this look without damaging your plants by keeping them in their individual grower pots when adding them to your planter.
All Just Add Ice® orchids are grown in clear plastic pots. One of the biggest benefits of grower pots is that you can check orchid roots without damaging them. (We advise you routinely inspect your plant’s roots for signs of overwatering.) Keeping orchids in their grower pots when placing them in a larger planter helps ensure they are not overcrowded and that their health isn’t compromised.
Grower pots also allow for you to change your décor as often as you like. For example, if you want to fill your planter with purple orchids in the spring but pink orchids in the summer, you can simply swap the first set out for the other. Take your purple orchids and place each one into any individual pot of your choosing or bunch them together inside a different planter.
Now you know you can safely keep multiple orchids in one planter, the next logical question is how do you make a planter? Follow these easy steps! For step-by-step video instructions, click here.
Orchid planters are a beautiful addition to any home or office. Look for Just Add Ice® Orchid planters in your local store or try your hand at making your own orchid planter creation!
Want more orchid projects and décor ideas? Check out our resources section!

